Saturday, 9 March 2013

The Forest of Tribes

Well hello there!
Today I have some fantastic green gradient, and fun tribal on top.

Let's start with the gradient itself

Green Gradient
For this, I used Essie 'Mojito Madness' and 'Navigate Her'. These look beautiful together.

Then, using Revlon 'Emerald' I drew some fine tribal detailing on the top, and after a day or two, I mattified them using Rimmel mattifying top coat.
Gloss Green Tribal Left
Gloss Green Tribal Right
Mattified Green Tribal

There's a tute for this design as well if you'd like to see it. It's a fairly straightforward design, but let me know in the comments if you'd like the step by step instructions.

Thanks for stopping by,
xNai

Wednesday, 6 March 2013

With ya head in the clouds

Hey guys!

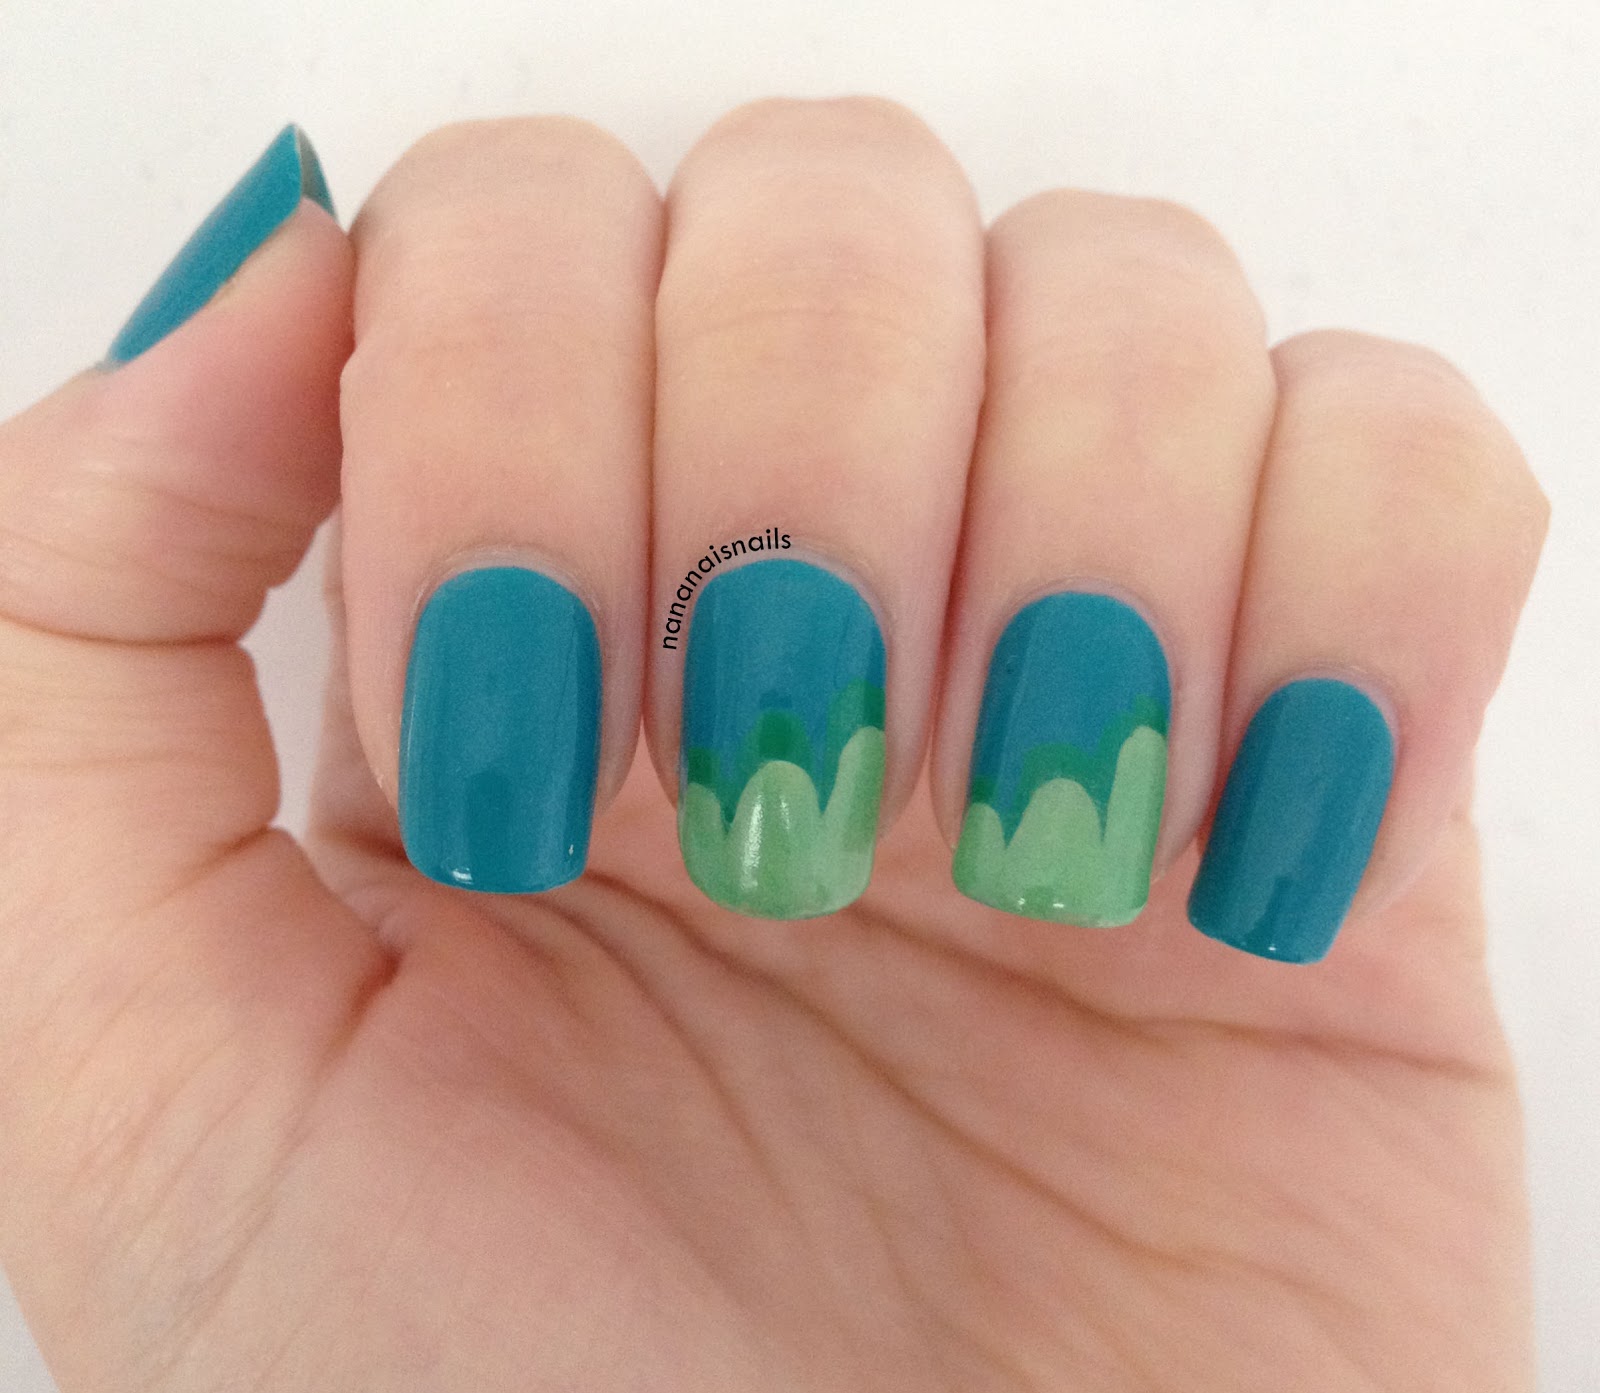
Today we have some simple clouds.
I had just received OPI 'Fly' and wanted to try it out. I love this blue, and think it works nicely with my skin tone, but didn't want to leave it too plain, and here we are!


The green at the tips is actually a glow in the dark polish, which sadly I couldn't get a decent image of, but had a lot of fun with in bed :)


What I used:
OPI 'Fly', and 'Zom-Body to Love' from the 2011 Halloween collex
An unnamed L.A. Colors green

Thanks for stopping by!
xNai


Sunday, 3 March 2013

Chunks of blacky goodness

Hey, you! Yes you. Right there...reading this! How are you?

Today I have a fairly pic heavy post, showing off a lemming of mine that was finally crushed a little while back.
I am, of course, talking about Kleancolor's 'Chunky Holo Black'.
And oh my, did it live up to my hopes and expectations.

Anyway, on with the show!

Indirect light with an AWESOME backdrop.
NAME IT.
Look at the range of colours in this glitter. All the way from a dark cherry red through orange, yellow, bright greens, and on some angles, into a deep blue.
In the shade


Mattified, in shade

Mattified in artificial light.

All I can say about this polish, is how happy I was to finally be wearing it. You all know how strange it is for me to be wearing one solid colour, let alone a glitter, and I wore this one for nearly a week!

Thanks for stopping by,
xNai

Wednesday, 27 February 2013

Argyle Dotticure

Hey guys!
As promised, here's the argyle dotticure tute. It's actually really very simple, and you can take this basic design and turn it into many different styles.

 What you'll need:
Two contrasting colours. Here I have Revlon 'Rock' and China Glaze 'For Audrey'.
Two different sized dotting tools


Paint your base coat and colour.

Using your large dotting tool, and place a column of dots down the centre of the nail.

On either side of the first column, place more dots, staggered from the first, as shown.

Using the smallest dotting tool, connect the large dots diagonally on one side, making sure to continue the little dots all the way to the edges of the nail.

Continue joining the large dots, and when done, top coat to seal in your design, and enjoy your super simple dotticure!


You can try matte top coats, glitter, and a myriad of other options!
Let me know how this goes for you, if you try it out.

xNai

Monday, 25 February 2013

Too hot for a sweater

Well hello there!
Today I have an argyle dotticure for you in both matte and gloss.

Argyle Dotticure - Gloss

Argyle Dotticure - Matte

What I used:
China Glaze 'For Audrey'
Revlon 'Rock' and 'Fierce'
Rimmel's Mattifying Top Coat

I'll be posting a tutorial for this mani soon, so keep your eyes peeled like an emperor's grape.

As always, thanks for stopping by!
xNai

Thursday, 21 February 2013

Passionfruit fields forever

Hello again!

Today I have for you my first attempt at watermarbling. 
Now don't laugh at this first picture, I was trying different combinations of colours, to see which ones might spread well enough to let me create designs.


I started from the thumb, and landed on a decent combination on the pinky.
I then proceeded to marble my left hand, and this is what it looks like!


This is Revlon 'Cotton Candy' and 'Passionfruit'
You can see on the index finger, that the flower is a little smudged.
I'm pretty sure it happened because I didn't clean the top of the water properly before pulling my finger out, and got some of the wet polish on the design.
Such a shame!


Very proud of these babies, they were my first successful watermarble!

Thanks for stopping by,
xNai

Sunday, 17 February 2013

Gradient half moons

Hello chickens.
As promised, here is a tutorial for the pink gradient half moons.

What you'll need:
Your two colours, I have pink (Essie's 'off the shoulder') and a white (Sally Hansen 'White Out')
A latex sponge with which to create the gradient
Glitter to place around the moon
Masking tape, foil and a toothpick.


First, paint your base coat and a coat (or two depending on your polish) of white.

Next, cut a semi circle out of the masking tape, and place it on the cuticle end of the nail.
Alternatively, you can use the rounded end of a bandaid, or a binder hole reinforcer, or any sort of rounded sticker.

Paint the two colours for the gradient onto your sponge in stripes, and dab it onto your nail.

You can repeat step 3 as many times as you like to achieve the desired intensity, but make sure you let each layer dry completely before applying the next layer, otherwise you'll pull up the layers below.

Once you've reached the colour intensity you want, pull the tape off quickly - you don't want the paint to dry too much on the tape.


Now you can do some glitter placement, if you like!
Paint some of the glitter polish onto the foil, and using your toothpick, pull out individual glitters, and place them where you'd like them on the nail.
I've used them around the moon, and as an added bonus, it helps cover up potentially dodgy lines...:)


Top coat and you're done!

Hope this is helpful.
Good luck, and I'd love to see your attempts!

xNai